Blog Posts

By:
Roofing By Hernandez
May 13, 2021

Facts About New Roof Installation

You need new roof installation answers and Roofing by Hernandez has them!

If you own a home for long enough, chances are you’re going to need new roof installation at some point. It’s the same for every homeowner and many just aren’t confident about the whole process. What does the process look like when you’re a customer? How long does the whole thing take to complete? If these questions sound familiar, don’t worry because you’re not alone. We’ve heard them from homeowners for decades and have all the answers about new roof installation you’ll ever need. Just read on to learn more!

Okay, so maybe there’s not every possible answer to every possible question in the article to follow. That would make a very long, very boring article, honestly, but we’re always happy to provide specific new roof installation insight whenever you need it. Just call (312) 439-0556 or use our contact form and we’ll call you!

Hypothetical Asphalt Shingle Roof Installation Project

Morning of Day #1: Dumpster Delivery

Alright, you’re our hypothetical new roof installation customer and your home needs new asphalt shingles. That’s excellent and we’re ready to help after you’ve completed the paperwork. The first thing we schedule is dumpster delivery. We can’t tear off the old roof without somewhere to put that material and that’s where the dumpster comes in handy.

We provided you with a window for this delivery and informed you that you would need to move all vehicles and obstacles from the dumpster’s chosen location. The truck will be at your property between 7:00 and 10:00 am so watch for them and get ready to start roofing!

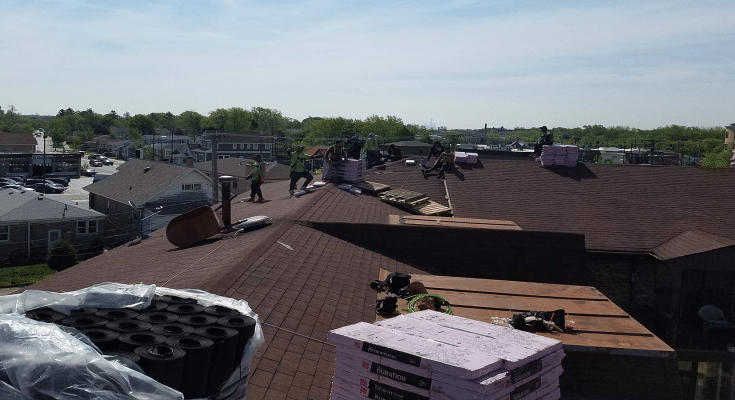
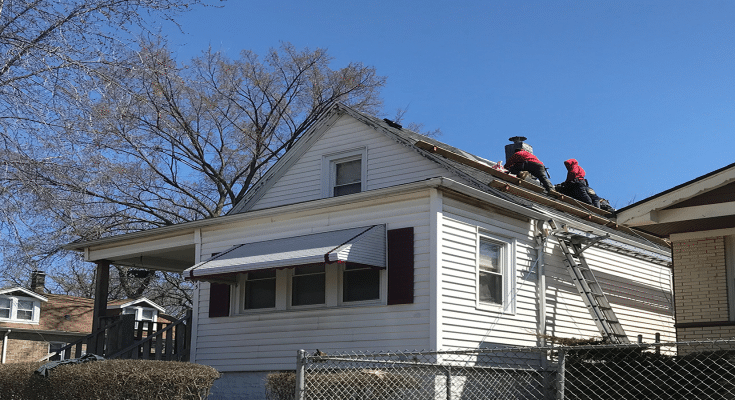
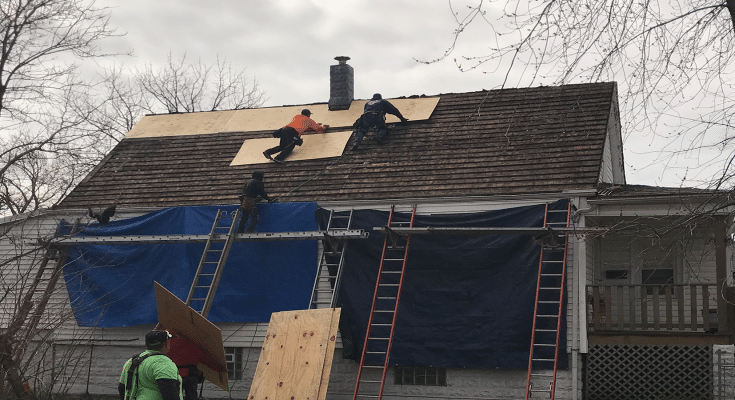
Roofing Day #1: Tear-Off Old Roofing

So, once we have verification that the dumpster is onsite, our team will arrive to begin the work – usually between 25-45 minutes after delivery of the dumpster. We do our best to time this right as every minute of daylight we’re not on the roof is a wasted opportunity to get more done.

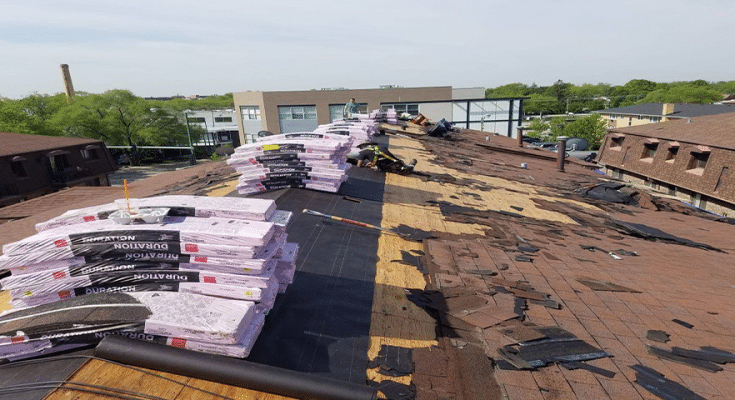
The tear-off of the old roofing material begins at the edge of the roofing furthest from where we’ve placed the dumpster. This is done so that our team can apply a dry in material that covers the exposed wood and protects your structure’s interior as the installation is ongoing. You never know when a shower might pop up so better safe than sorry is our motto  – and another reason to choose Roofing by Hernandez for your roof installation projects.

All of the torn-off material will be carefully placed in the dumpster so that it’s removed completely from your property when all is said and done. Last, we’ll have the shingles brought to the jobsite just as we complete the dry in work so that we’re ready to go in the morning.

Working Day #2: Asphalt Shingle Installation

This is the big day! We’ve removed all of the old roofing material and applied dry in material to keep the woodwork safe. Now it’s time to lay down the new material including the industry-leading asphalt shingle products we rely on. The work usually can be completed in the second day but we can never be certain until we’re onsite and handling the specific roof. Some like to surprise you with unseen damage or structural issues.

That’s where the inspection comes in. Many municipalities in the local area require that a roof inspection takes place as soon as the work progresses to a certain degree – say 25% completion. We’ll check with your municipality prior to getting underway so you can sit back and relax.

Roof Installation Complete – Actual Time Will Depend on Roof

No roofing projects are the same and while we try our best to meet specific timelines, some things can happen that will be beyond our control. Rest assured, we’ll keep you updated every step of the way and ensure you’re always on the same page with our team. The end result – a spectacular asphalt roof installation!

New Metal Roof Installation

Prep for Day #1: Dumpster Drop-Off

The process for installing a new metal roof for residential customers across the area begins much the same as it does for asphalt shingles – with the delivery of a dumpster for our uses. Yes, it will be onsite for the entirety of the work but for a good reason – to ensure every bit of scrap and material ends up where it should be, not in your yard.

As we will have discussed this step in detail prior to the day we begin, you’ll be aware of the dumpster delivery in plenty of time to make certain that all vehicles and obstructions that need to be moved have been before the truck arrives to drop it off. This is normally between 7:00 and 10:00 in the morning and we’ll make sure you’re ready for it when the time comes.

Working Day #1: The Tear-Off Process

Okay, so the dumpster is in the right spot and our team can begin to tear off the roofing material – no matter what that happens to be. As you’ll have come to expect from your interactions with our team to that point, we’ll have schedule the roofers to arrive directly after the dumpster – no wasted time when working with Roofing by Hernandez!

Our experts will start removing the old roofing material at the far side of the roof from where our dumpster is located. This is done so that, as we move from one side to the other, we can lay down dry in material to protect the wood and interior of the structure until installation is completed. You’ll get forward-thinking and solid planning every time you work with Roofing by Hernandez. It’s how we operate and why we’re #1 in new roof installations – be they flat, sloped, metal or otherwise!

Working Day #2 to #4: Old Material & Complexity Impact Installation Time

After we have removed the old material, and the dry in has had a chance to set, we’ll begin installing the brand new metal roofing of your choice. This process is handled exactly as we handled the tear-off – from the furthest side to the dumpster side. This is done because metal roofing demands it. It requires each roof section to be addressed individually, so all the valleys and peaks will need special attention to ensure that the finished product is world-class and up to our usual standard.

Because of the way metal roofing must be installed – piece by piece – it may take anywhere from three days to a few weeks. It really is wholly dependent on the complexity and challenges the roof brings to our expert metal roof installers. We never waste time but we’re also just as concerned with doing a fantastic job and striking that balance can take longer than a traditional asphalt shingle roof – no matter how skilled we are.

As with shingle roofing, we may be called on to perform a roof inspection once work has progressed to a certain point – say 25%. This is a rule laid down by certain municipalities, so check with your Roofing by Hernandez professional when discussing your roof to find out more. We’ll know for sure and make sure you do too!

Installation Complete – Timeline Depends on Specific Roof

Finally, we’re through with the new roof installation and your new metal roof looks fabulous. And it will for years to come so enjoy it and the envious looks it brings from your friends and neighbors. Before we leave, we’ll take time to inspect the roof with you and ensure you’re completely satisfied. See? We told you it was easy!

New Roof Installation Is Easy When You Choose Roofing by Hernandez!

As we’ve outlined the process for you, you should no longer worry that a new roof installation is a project to dread – especially when you choose to work with Roofing by Hernandez. We’re Chicago’s best roofer with decades of combined new roof installation experience. Give us a call at (312) 439-0556 when it’s time for your new asphalt shingle or metal roofing and we’ll deliver an exceptional experience along with the finest roof installation in town!

Read More
By:
Roofing By Hernandez
December 10, 2020

New Roof Replacement Procedures

Roofing by Hernandez ensures that each step in building your roof is done with a level of precision that you can count on. Each step in the process is important to do properly so your home will have protection for years to come. If you are looking for a roofer to install a new roof, it would be in your best interest to do a little research to know the steps it takes to install a roof properly. Also, do your research on the roofer you are considering before hiring that company. If you are interested in what goes into building a roof, you’ve come to the right place. Here we have broken down the process into steps for you to understand.

Identify Local Building Codes & Obtain Permits

Make sure to check with your residential local building codes regarding roofs. Certain cities require only particular materials or a specific number of shingles. This is to ensure aesthetic continuity in the community and to prevent any untoward incident uprooted roofing materials cause during any possible violent weather conditions. Before starting, obtain any building permits to avoid any costly local civil code penalties.

Old Roof Tear-Off Before a new roof can be installed on an existing structure, the old roof must be removed in its entirety. Be careful to ask what your roofer plans to do and check to make sure they aren’t skipping steps. There have been fly-by-night roofing companies known to lay new roofing materials over the old roof. This is a sure sign that your roof isn’t being properly installed. Typically, you will see a shovel being used and all of the trash being thrown away first before new materials are brought out. It can be time-consuming to tear off all old roof shingles. If pieces of the old roof are left behind it can tear into your new shingles which can shorten the life of your roof. It is very important to not skim past the steps in the process because the roof is vital protection for your house.

A Drip Edge is Installed: A drip edge is a metal flashing that is installed around the edges of the roof and allows water to drain off which prevents shingles curving and from ruining fascia boards. The drip edge overhangs the sides of the roof and is fastened to the eaves before the underlayment is installed. The drip edge will need to be nailed every couple of feet to keep it firm and secure.

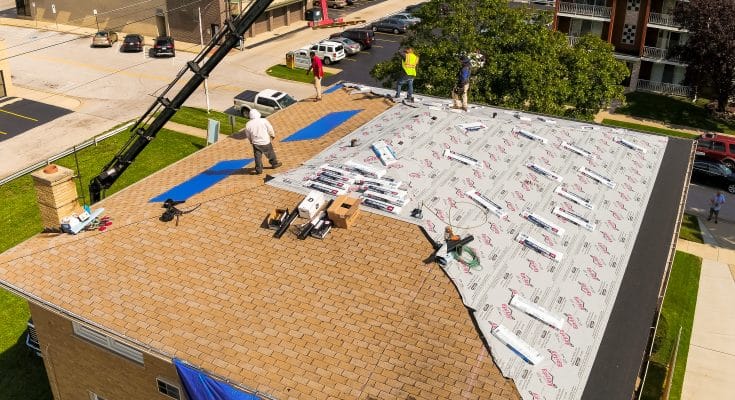
Underlayment is Rolled Out: Underlayment is important because it can prevent ice dams and strong winds from allowing water into the house. This material self-sticks, so the backing is peeled off and the underlayment is applied as flat and straight as possible to the deck. Depending on the temperature (warmer is better) it might stick on its own or require a few nails to keep it in place.

Cover the Roof with Felt: Felt or tar paper put on next. It’s a simple process of rolling out the material in short sections and stapling it in place. This is used to prevent water from getting under the shingles. The material should overlap the one laid before to create adequate coverage so make sure this is done correctly.

Install Drip Molding & Waterproof Roof Valleys: Drip molding leads rainwater straight to the gutters of your roof. A chalk line is used to align the drip molds which are typically installed by 12 inches. Roof valleys help to direct rainwater away from the roof. Then the felt paper is installed with different methods to protect the roof valleys to allow the specific structure of the valley coverage. Now that the underlayment and drip edge is complete, it’s time for the shingles to start.

Starter Shingles Then Install Shingles: The first step is to create the first row of flat regular shingles. The roofer needs to lay starter shingles first. Shingles are meant to overlap one another for correct shingle coverage. This creates a barrier that prevents leaks by keeping the water from running in between the seams of the first shingles. Once the flat row is nailed then the shingles are installed in an overlapping pattern and secured with a nail gun. The roofer will work his way up and across hammering each nail about 2 inches from each end of a shingle. Then will secure another nail an inch above each cutout. Each shingle at the end of the row should be cut to size, then repeating to the ridge. The shingle is then bent over the ridge so that each side is equal and it’s nailed into place. The shingle process can seem time-consuming but because it’s the last stretch it’s probably is the most fun and easiest part of roofing a house.

Flashing is Installed: This extra step that should be completed to ensure a tight seal around structures on the house. Flashing will be installed around anything that’s on the roof such as sunlight, windows, or chimney.

Cap the Ridge: You may have noticed the top shingles that cover the very peak of your roof, those are specific shingles designed for capping the ridge at the peak of your roof. These tougher shingles may require longer nails as they are securing many layers of shingles. These also give the roof a finished look that is great for curb appeal.

Clean & Apply Roofing Seal: Make sure that your roofer removes all trash and any debris leftover from the job. Then they will seal the exposed nails and also use roofing adhesive to create a watertight seal around the exposed nails. This helps to protect the nails from becoming loose during bad weather conditions.

So now you will have a better idea of what it takes to build a shingle roof. As you can see, there are many steps required to create a stable structure to protect your home. So you can see how important it is to choose the correct team or company to complete the job. Please call us for your free estimate.
Read More
Categories: Blog Posts
By:
Roofing By Hernandez
December 10, 2020

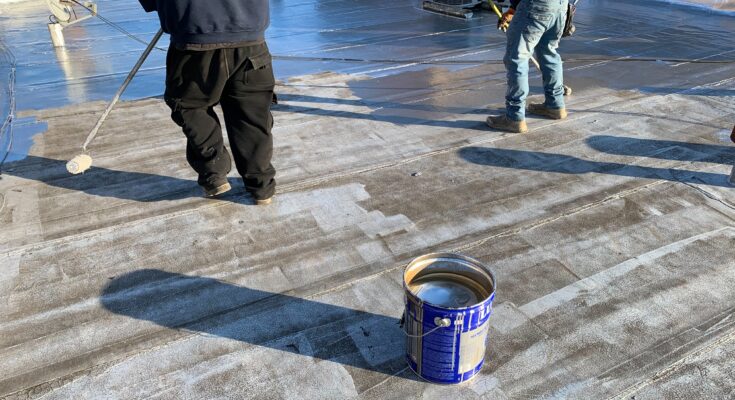
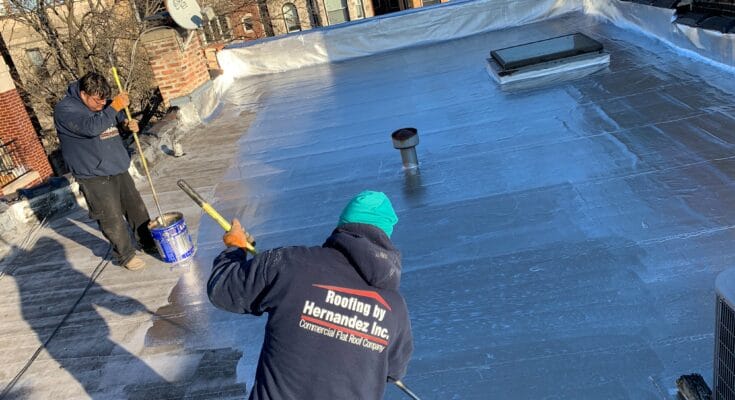
Modified Bitumen Roofing & Aluminum Coating

A modified bitumen roofing system is popularly used on roofs in Chicago because of its superior quality and ability to withstand the harsh climate. Modified bitumen is a roofing asphalt that is used for flat roofs; it has many layered sheets of fiberglass or polyester that are combined with asphalt for a durable high-strength flat roof. It’s one of the most common low-slope roofing systems. Not to be confused with similar materials like asphalt roll roofing, EPDM, or TPO, modified bitumen combines hot asphalt with plastic and rubber additives. It is the top choice due to its waterproofing feature. A bituminous roof is used to build water & vapor-proof. The flexibility and protection are why it’s so widely used. But in the city, you can’t have modified bitumen membrane roofs without a coating.

DID YOU KNOW? The city of Chicago requires that modified bitumen membrane roofs be aluminum coated to be in compliance. The cost for this service runs between $1.00 – $1.50 per square feet.

Roofing by Hernandez has many years of experience with this type of roof installation. We are also available to perform maintenance, patchwork caulking where it’s needed before coating the roofs.

These are a few typical aluminum coatings that are commonly used.

  • 628 Aluminum Coating Utility Grade – Non-Fibrated Provides A reflective surface for roofs, metal buildings, and mobile homes. Formulated from specially refined asphalt, aliphatic solvents, and ASTM D-926
  • 608 Aluminum Coating 2 Lb. – Non-Fibrated A reflective surface for roofs, metal buildings, tanks, and mobile homes. Formulated from refined asphalt, aromatic and aliphatic solvents, and 2 lbs per gallon of ASTM D-962 aluminum paste.
  • 648 Aluminum Coating 3 Lb. – Non-Fibrated The difference is that it uses refined asphalt, aliphatic solvents, and 3 lbs. per gallon of ASTM-962 leafing aluminum paste.

The Lucas brand is the one we use most often. They specialize in coatings and mastics for the roofing trade.

Any waterproof flat or low slope roofing has three main sections which include the membrane forms, flashing, and seals. The membrane forms the bulk of roofing on flat roofs. In modified bitumen’s case, this is where bitumen and reinforcing materials are layered. The more layers there are, the longer the life span can be. Flashing generally refers to anything that creates a seal around interruptions in the body of the membrane. These include pipes, vents, and roof edges. Seals refer to any sealed overlap (i.e. joint) between two waterproof materials. It could be any combination of membrane and flashing. Depending on the polymer blend, cold adhesives, hot-welding, or self-adhesion can be useful in creating seals. Roof failures are known to occur in seals and flashing, so the installation calls for special care to ensure that these parts are sealed continuously. Then the aluminum coating is installed to ensure that everything is up to the code and regulations set by the city of Chicago.

Please call Roofing by Hernandez today for your free consultation on a modified bitumen roofing system and/ or aluminum coating.

Read More
Categories: Blog Posts
By:
Roofing By Hernandez
December 10, 2020

Insurance Claim Process

The insurance claim process can feel very intimidating for homeowners. It can be time-consuming and frustrating if you don’t have much knowledge of what to expect. Many owners simply don’t want to do the tedious paperwork that is involved with claims. Typically, the first thing most homeowners do after seeing damage to their roof is to call their insurance company. It may seem like the logical first step but may not be in your best interest. Did you know that your roofing contractor can help walk you through the insurance process? You may not realize that a good roofing company will assist with the insurance paperwork. They will document the damage for you along with giving an estimate, then will work directly with the insurance company on your behalf.

Your roofing company will assess the damage and create a thorough estimate to send to the insurance company. If you call the insurance company first, they will send the adjuster hired through them. The difference between an insurance adjuster and a roofing contractor is that they don’t work on roofs every day. Adjusters just don’t have the experienced knowledge that a roofer has when looking at the damage. Sometimes the insurance adjuster looks at surface damage and may miss damage underneath that a roofer would know to look for and would document in detail. A roofing contractor will search for the root of the damage and uncover the underlying structural problems.

You definitely want to consider calling your roofer first because they can get you prepared before calling your insurance company. Roofing by Hernandez has access to using the same estimated software that the insurance adjuster will use and we work with insurance claims every day so we’ve got the experience and expertise to make the claim process much easier for you. The estimate through Roofing by Hernandez can then be compared to the estimate given from the insurance company and the contractor can explain the additional items that are needed to repair the roof accurately. Most importantly the contractor will negotiate directly with the insurance company to ensure that they are considering all of the repairs needed and will distribute sufficient funds to properly replace or repair the roof of your home. As your roofing contractor, we will be in your corner and will have your back when negotiating with the insurance company.

Once an occurrence happens maybe you see roof damage after a storm and you need to file a claim, do you know where to start? As a homeowner, hopefully, you will go your entire life without making an insurance claim, but as they say hope for the best and be prepared in case something does happen. A roof on a home is just as crucial as the foundation, if damage occurs and is not fixed immediately the next storm could bring the house down, so to speak, and if an owner is not prepared they could lose the contents of their home as well. If you recently noticed water damage in your house after a storm and are looking for the steps to file a claim, you’re in luck! We’ve created easy steps to guide you. And are here for you every step of the way so you can breathe easy. Call us for more information on how we can help.

Step 1: Documentation with Photos– As soon as you notice damage has occurred get your camera out and capture what you see. Make sure to get different angles and zoom in on the details. Sometimes, water damage can only be seen after a rainstorm. If the pictures are taken after the water dries, this may result in an insurance denial or underpayment. Take photos from the inside and out and anything that was affected by the damage. Rule of thumb, don’t dispose of any shingles or rotted wood from the roof. These items may give more information about what’s going on underneath the surface. Document when and where the damage occurred. Be very detailed in your description and with your photos. It’s better to have too much information than not enough when dealing with an insurance company because it could mean the difference between a successful or unsuccessful payout.

Step 2: Gain Knowledge on Your Insurances- It’s very important to have an idea of what your homeowner’s insurance entails and understand the terms. You may not have read through your insurance paperwork when you signed and perhaps won’t feel the need to look over it until something disastrous happens. Perhaps the most affordable option was chosen at the time so you could keep your mortgage/escrow payments as low as possible. Did you choose a high deductible so that your monthly or annual payment would be lower? Understanding what type of policy you bought is something in which attention needs to be focused on. You need to prepare yourself for the deductible that will be requested. Have you saved that amount just in case? Would a loan be needed to cover the difference? Did you purchase extra contents insurance that may reimburse you for any items that had water damage? Research what you have and understand what is covered in your homeowner’s insurance policies.

Step 3: Contact Your Roofing Contractor Before Filing a Claim– If you’re like most people, lengthy paperwork is probably not your favorite thing to do. It’s a time-consuming process to gather the information and complete every component correctly because if something is not accurate it could create a stall in the process. When filing a claim on your homeowners’ insurance, there may be sections or questions that are confusing. A homeowner may get intimidated by the paperwork and procrastinate. This can be a terrible decision because all it takes is another storm to come through to create more damage while you are waiting. An owner may become discouraged because it’s taking too long to hear back from the insurance claim representative. This is why it’s so relieving to have a good roofing company like Roofing By Hernandez (RBH) to be in your corner when your home has been severely damaged. RBH can see what is included based on your specific insurance policy. A roofing contractor can give the best options for repair, we will give estimates & all the needed paperwork to the insurance company for you. We will speak directly with them so you don’t have to. We will handle the headache of negotiations and have many years experience doing so which will give you the peace of mind that it is handled and you can go back to your daily life without feeling the frustrations of your claim. We will work together as a team to ensure that the insurance company provides proper compensation for your repairs. We have many clients that have shown their gratitude for our involvement in their process.

Step 4: Start the Paperwork– You will need to do your part by helping your roofing contractor gather the much-needed information to file your claim. This paperwork feels like a hassle, but with our help, it doesn’t have to be. We will need access to the property to evaluate the damage. All of the policy information is needed along with your findings and photos. Proof of loss form may be needed for contents. Be sure to retrieve and give all of the necessary paperwork to your roofing contractor as soon as you can so we can start this process immediately.

Read More
Categories: Blog Posts
By:
Roofing By Hernandez
December 10, 2020

Best Shingle for My Home

Best Shingle for My Home: Duration Shingles from Owens Corning

Duration Shingles with SureNail Technology by Owens Corning Roofing & Asphalt!

As a Roofing Company, we’ve worked with many shingle brands and manufacturers. There can be a big difference between the shingles that are used to cover a roof.

Lower-grade shingles are builders grade shingles. They may only last 5-7 years; then you may start to have issues. The higher-end shingle brands will hold to higher warranties. As the shingle manufacturing has evolved so have the warranty lengths. Warranties went from 10 years to 30 years to now covering a lifetime warranty on your roof.

One way to tell if a shingle brand is a good one is the weight. Asphalt is expensive and weighs a good bit. The less valued brand shingles may seem lighter weight and it’s because the manufacturer perhaps cut corners and used less asphalt. Their shingles packaging when weighed will not be as consistent compared to higher quality brands. Quality shingles use consistency in their granule amounts and asphalt.

The easiest way to tell if a brand of shingles is top of the line is the nail zone. The first thing the manufacturer does when you’ve claimed a problem with the shingles is looking at how they were installed. The inspector is looking at the nail zone. The best shingles will have an obvious nailing zone. You will see a distinct line in the higher grade shingles. Lower quality shingles have a narrower nailing zone and simply aren’t consistent. The manufacturer inspector may say that the shingle was installed in error such as high nailed so it’s not covered. The lower end shingle manufacturers don’t want to stand behind a long-term warranty and don’t have distinct lines to show an obvious installation so it creates a gray area.

This nail zone is the main difference between other shingle manufacturers and Owens Corning Roofing & Asphalt because they use SureNail technology design. What is so outstanding about SureNail design? It features a tough engineered sturdy fabric on the nailing area which provides the extra reinforcement on the critical interface where the shingle is fastened to the roof deck. It creates an extremely obvious nailing zone with enhanced true bond, woven fabric tape that is embedded in the shingle. No other shingle has this patented SureNail technology. This adds a great deal of strength and superior adhesion to the shingle which is what keeps the warranty and wind warranty in existence. Owens Corning puts its products through testing with pull resistance. 87% of contractors rated the Duration Shingles with SureNail technology as the best compared to other shingle products.

From experienced experts who have used many shingle brands over the years, Roofing by Hernandez stands behind this product: Duration Shingles with SureNail technology by Owens Corning Roofing & Asphalt.

Read More
Categories: Blog Posts
By:
Roofing By Hernandez
October 30, 2018

The Right Time For A New Roof

The Right Time For A New Roof

While many people automatically assume that summertime is the best possible time to install a new roof on their home or business, there’s actually no “right” time for the work to be completed. Roofers work year-round in most cities, so there’ll be a team out there willing to do the work if you need it done. However, costs for roofing services can be quite different depending on the season, so it pays to do some homework and plan ahead. In fact, that’s the single biggest factor in a new roof installation – planning.

The Optimal Time

There can be little doubt that the optimal time to install a new roof is when you’re ready for the expense and the intrusion. Many homeowners wait as long as they possibly can to get every bit of life out of their old roofing which is their choice, but can be a dicey proposition – especially if moisture damage is a possibility. It’s always best to avoid even the possibility of damage to your decking and framing. That kind of water damage can become costly to repair, so best to have your new roof installation done as quickly as you determine it’s necessary.

Summer Roofing vs. Winter Roofing

It should come as no surprise that summer is the busiest time of year for roofers across Chicago. With the weather we experience yearly, it only makes sense that you’d choose the one time of year you can be sure it’s not going to snow. However, being peak roofing season means scheduling a new roof installation during these times can be difficult. There could be wait times as long as a month with reputable roofing companies, so if you’re considering a summertime installation, you may want to plan for it far in advance.

Roofing in summertime is the preferred time of year for several reasons. First, it’s the easiest time of year to handle all the work without precipitation. A hard rain can be a real problem during roof construction, so handling the work when you can be certain that’s not coming is ideal. Second, the temperatures are considered better by some for the materials during installation. This isn’t the belief of all roofers though. Some actually believe temperature isn’t a factor as long as concrete isn’t involved, but it does play a role in the hectic nature of summertime roofing requests.

Having your roofing done in a season other than summer will mean less wait time and lower costs. In fact, prices for materials are far lower in the wintertime and crews may not be scheduled for anything. That means you’ll be able to choose your own date for the work to be handled and get all the details sorted to your own liking. That’s huge when it comes to a project as intrusive as a new roof installation – especially when it’s below freezing outside. You may want to get a hotel to keep from sleeping with an open rooftop.

Ready For Roofing?

No matter what type of roofing your structure has, or what you’re considering using, you’ll need a great roofing team to handle the installation to get the best possible results. Modern materials – especially flat roofing materials made from petrochemicals – take an experienced hand to properly install and a contractor willing to stand behind the roofing installation for years to come. In Chicago, that team is roofing by Hernandez. We offer roofing installations year-round and specialize in insurance claim roofing for those unfortunate and unforeseen replacements.

When you’re in need of a professional’s help – whether that’s for an inspection and free estimate, or clear and detailed explanations of all your available options, Roofing by Hernandez is the right team to call (312) 439-0556. Give us the chance to speak with you about your roofing installation and show you what separates us from all the rest – commitment, dedication, workmanship, and pricing.

Read More
By:
Roofing By Hernandez
April 13, 2018

Insurance Claims Explained

Insurance Claims Explained. Though most people don’t think of it as such, your roofing actually plays an integral role in the overall structural integrity of your home. So, when something bad happens to it, be it from weather or sheer coincidence, it pays to have insurance in place to quickly get the problems solved and your home or business back in tip-top shape. Roofing by Hernandez specializes in assisting our customers with their insurance claims to do what we can to minimize the delays and red tape inherent in dealing with insurance carriers.

Before we get into dealing with the insurance company, it’s important to find out exactly what kind of coverage you have: ACV coverage or RCV coverage. Depreciation means ACV coverage may not pay for the full cost of replacing your roof – especially if it’s older. That’s why a replacement cost coverage policy, which covers everything after your deductible, is always a safer play.

So, knowing what kind of policy you have is only the first step. The next is calling (312) 439-0556 to speak with one of the expert claims specialists from Roofing by Hernandez about your roofing issue. We’ll schedule the earliest opportunity to have a specialist out to your location to assess the damage and provide an estimate for the needed repair or replacement.

With the estimate from our specialist in hand you’ll know whether or not the damage sustained will cost more than you deductible to repair or replace. If so, it’s time to call the insurance company to make a claim. Our expert will stay with you and assist you and your insurer through the process with any roofing information needed to finalize the claims process. This often includes meeting with an insurance adjuster to explain the estimate and any other viable options for addressing the problem.

Once the adjuster has signed off on the estimate, you’ll be sent the first of two checks for the work from your insurance company. This down payment will be used to get the roofing work underway and the second check will pay the outstanding balance when all work has been completed. It’s a complicated and confusing process for many home or business owners, but it doesn’t have to be; not if you partner with Roofing by Hernandez.

Read More
Categories: Blog ListBlog Posts
By:
Roofing By Hernandez
February 24, 2018

Roofing Estimates Explained

Roofing Estimates Explained. Whether you own a residential or commercial property, your roofing is a large part of that investment and any work that needs to be done, be it repair or replacement, will require at least one (but preferably more) roofing estimates from reputable roofing contractors. With so much at stake, getting several estimates is a best practice simply because it allows you to compare one directly to another in an attempt to identify any and all discrepancies between the two. With even more estimates, you’ll get a much clearer picture of the real costs of your roofing project and be much better prepared to choose the good from the bad.

No matter how many companies you call for a roofing estimate, there are some things you can expect to find common amongst all the estimates you receive. These standard items should be clearly defined to give you the best idea of what costs what and why. These items are:

  • Project Responsibilities: Who’s responsible for specific work.
  • Project Timelines: Start and end dates.
  • Payment Terms: Payment amounts and dates.
  • Cost Labor & Materials: How much both will add to total.
  • Cost for Permitting: How much to handle permits.
  • Debris Removal: Will cleanup add to cost?
  • Materials Information: Including underlayment, flashing, shingles, etc.
  • Warranty Information: Both manufacturer and contractor.
  • License & Insurance: This should be included upon request.

When you work with Roofing by Hernandez, you can rest assured that all these things will be provided with our free estimate in the hopes that you’ll choose us to work with for your roofing project to day and all those to follow. We’re the right fit for whatever you’re planning and will deliver the results you’ve always wanted at prices you can afford. So, pick up the phone and call (312) 439-0556 today for the best workmanship in all Chicago!

Read More
Categories: Blog ListBlog Posts
By:
Roofing By Hernandez
January 23, 2018

Chicago Roofing Tips

Chicago Roofing Tips. There are a great many useful tips for keeping your roofing going as long as possible and some of these can be easily handled by you, the home or business owner, without the need for calling in the professionals from Roofing by Hernandez. We know our prices are the best in town, but we understand that some regular seasonal maintenance is enjoyable to the average property owner. It gives you the sense of ownership you forget when you’re too long from the tasks that keep your structure humming along throughout the years. So, here are five tips for the summertime and five more for winter to keep you busy with tasks all year long. But, don’t forget to call (312) 439-0556 for the big problems and let our pros take care of the heavy lifting.

Summer in Chicago has its own unique appeal and for most of us that appeal is tied directly to sunshine and the outdoors. It’s understandable after slogging through snowfall and freezing temperatures all winter that we’d want to get out into the fresh air as soon as we can, so here are a few things roof-related you can handle while you’re outside and save yourself future headaches.

  • Check to make sure your exhaust fans are free of debris and working properly.
  • Check drains and gutters for any clogs that could cause backups during rains.
  • Check your roofing and attic (if applicable) for any small signs of damage. If you spot anything, call Roofing by Hernandez for a roofing inspection.
  • Look for missing, damaged, or lose shingles or roof tiles. If found, call the pros at Roofing by Hernandez for immediate repairs.
  • Check your roofing, vents, components, and attic (if applicable) for signs of any pests and call the appropriate pest removal company immediately. If needed, call Roofing by Hernandez for repairs.

Winter will be here before we know it and it brings its own set of unique challenges to your roofing. These challenges are best dealt with by the experts from Roofing by Hernandez, but you can do your part as the home or business owner to keep your roofing going strong for as long as you possibly can. After all, those extra years are extra return on your initial roofing investment, so doing your part is just sound ownership. Here’s what you can do:

  • Inspect and trim any trees surrounding your home. These can break under the weight of ice and snow and cause damage to your home. Better to get them trimmed up before it’s too late.
  • Clean your home or business’s rooftop gutter system. These gutters play a vital role in moving the precipitation and snowmelt from your rooftop to the ground, so clearing them of any debris is a must.
  • Install an attic ventilation system (if applicable) to help circulate the air in your attic. This will prevent snow and ice from accumulating on your shingles and causing them to warp from the stresses.
  • Inspect your rooftop flashing to ensure it is seated and attached properly in all areas across the structure. This is imperative to keeping moisture out of extremely sensitive areas. Call Roofing by Hernandez if you find any problems.
  • Replace any loose or damaged shingles to keep your roofing working at peak efficiency. Missing shingles can cause all sorts of trouble once the snow and ice hit, so have them replaced as soon as they’re discovered.

That’s all it takes, ten little steps, and your roofing will keep on protecting you and your property from the worst that Mother Nature can throw at it – especially when coupled with proactive roof maintenance from Roofing by Hernandez. That’s a winning formula for roofing that lasts years and years and all it takes is one call to (312) 439-0556.


Read More
Categories: Blog ListBlog Posts